
Simple static blog with 11ty, DecapCMS and Netlify
Deploying a simple static blog with 11ty, DecapCMS on Netlify for free
by Tim Heidler on Mon Jul 17 2023
Getting started
Before starting, you should make sure that the following requirements apply to you
- GitHub account
- Netlify account (can be created using your GitHub account)
- a coding editor (for example VS Code)
- Node.js installed on your PC
- Git installed on your PC
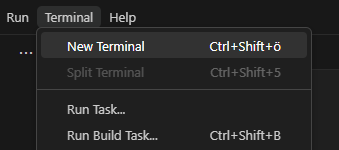
Start up your favorite code editor (in this Tutorial, I'll be using VS Code ) and open a folder, where you want to create your Blog. Next up, open a terminal in your folder. In VS Code, press on "Terminal" at the top of the program and then on "new Terminal".
Now we want to tell Node.js more about our project, with the package.json. To create this file, type the following command in the Terminal.
npm init -y
We also need 11ty to be installed in our project. Which is done with the command:
npm install @11ty/eleventy --save-dev
Next up, open the package.json by clicking on it in the file explorer build into VS Code.
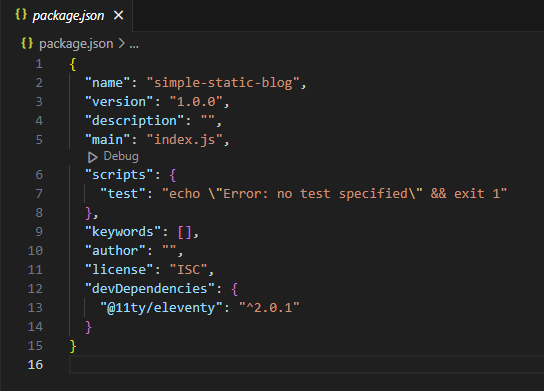
The package.json contains the basic information about your project, like the name, the version and also the commands the project runtime supports, listed under scripts. As you see, there is only one command called test. We want to get rid of this command and create our own. Replace the test command with the following two commands.
scripts in package.json
"start": "eleventy --serve",
"build": "eleventy"
Start will be used during development, and build will be to build the page for the deployment.
After that, we need to tell 11ty more about our project by creating a new file called " .eleventy.js " and pasting the following code block into it.
.eleventy.js
module.exports = function (eleventyConfig) {

    // Return your Object options:
    return {
        dir: {
            input: "src",
            output: "public"
        }
    }
};
The code block tells 11ty where the files you create will be (src directory) and where the build files will be (public directory).
Src directory and index.html file
now that 11ty knows where the files you create will be. Let's create them. Starting with the most important file the "index.html" this file will be the landing page of your Blog. At first, create a folder in the directory of your project called " src " in this directory will be all your code. In this folder, create the " index.html " and add the standard html5 template code in it.
src/index.html
<!DOCTYPE html>
<html lang="en">
    <head>
        <meta charset="UTF-8">
        <meta name="viewport" content="width=device-width, initial-scale=1.0">
        <title>Document</title>
    </head>
    <body>

    </body>
</html>
In the body tag, add a h1 headline with the main headline of your blog.
body of src/index.html
<h1>hello, world</h1>
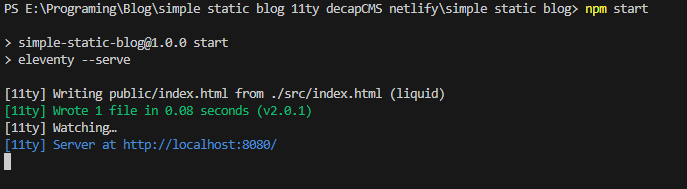
After wards, save the file and type the command npm start to start the web server of your blog. In the Terminal there should be a link displayed.
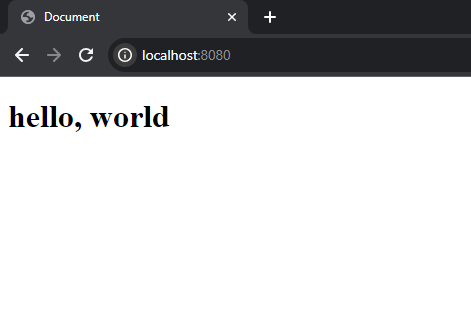
Paste the link into your browser and your h1 headline should be displayed on the page.
Adding style
to add style to your Blog, create a new file called " style.css " in the src directory and link in your index.html to your style by adding
head of src/index.html
<link rel="stylesheet" href="/style.css">
between your head tags.
In your style.css, you can then apply a style to your Blog. For now, we will make the background of the page black and the text white by adding the following code in your style.css .
style.css
body {
    background-color: black;
    color: white;
}
Do not worry that the page in your browser has not applied this style yet. The problem is, that we have not yet tolled 11ty that we are using a style. To do so, we have to edit our " .eleventy.js " file to add a PassthroughCopy of the style.css file.
.eleventy.js
module.exports = function (eleventyConfig) {

eleventyConfig.addPassthroughCopy("./src/style.css");

	// Return your Object options:
	return {
	dir: {
		input: "src",
			output: "public"
			}
		}
	};
Now the style should be applied.

Base.html
in order to create a site wide layout, we will create a new file called " base.html " and move the html5 template code in to it. The base.html file must be created in a subdirectory of your src directory called " _includes ".
src/_includes/base.html
<!DOCTYPE html>
<html lang="en">
    <head>
        <meta charset="UTF-8">
        <meta name="viewport" content="width=device-width, initial-scale=1.0">
        <link rel="stylesheet" href="style.css">
        <title>Document</title>
    </head>
    <body>
        <h1>hello, world</h1>
    </body>
</html>
Now we need to modify this static code to be used as the base layout of your blog. Change the text in your title element to " {{ title }} ". By doing so, 11ty knows that the variable title should be placed here. We also need to tell 11ty that the content of your pages should be placed in the body tag of your base.html. This is done by adding the following into your body tag.
body of src/_includes/base.html
<main>
    {{ content }}
</main>
Modifying index.html to use the base layout
in your index.html, we now need to remove the standard html5 template. In your index file should only remain the code you added into your body tag. For me, it's only the h1 headline.
/src/index.html
<h1>hello, world</h1>
Now that your index is only a single h1 headline, we need to tell 11ty to use the base.html layout we created earlier. At the top of your index add the following code blog which tells 11ty the title of the page as well as the layout this page should use. The title can be adjusted to your liking.
top of /src/index.html
---
title: Home
layout: base.html
---
If you now take a look at your page in your browser, it should look exactly like before. The advantage of using this base layout is, that you now can create multiple pages for your blog, that all use, for example, the same header or share one style between them.
Creating the blog page
by now, we are using a base layout for your index.html file. Now we will create another file called blog.html which will show all the blog posts you will create. Start off by creating the new file in the src directory and pasting the information for 11ty.
---
title: Blog
layout: base.html
---
Once created, you can do your browser and add /blog to the end of your URL ( http://localhost:8080/blog/ ), the browser should now show a new page empty with the title being "Blog". Below the information for 11ty now can create our blog page for this we will first create our fist blog post.
First blog post
In your src directory, create a new folder called " blog ". All blog posts will be saved in this folder. In the new created folder, create your first blog post. I'll call it first-post.md the ending ".md" means that this file will be a markdown file.
src/blog/first-post.md
---
title: first post
tags: post
layout: base.html
---
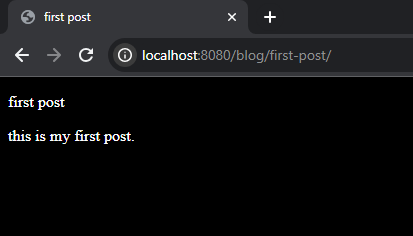
first post
this is my first post.
The tags attribute is important for the next step. It allows you to later ask 11ty for all entries with this tag. The text you place below the 11ty information will be the text displayed, once the blog post is opened.
List all blog post on blog page
next up in your blog.html file, add the following code, which creates an unordered list with a list element for every blog entry that has the tag post in the information part.
<div>
    <h1>Recent articles</h1>
    <ul>
        {%- for post in collections.post | reverse -%}
            <li>
                <a href="{{post.url}}"><h2>{{post.data.title}}</h2></a>
            </li>
        {%- endfor -%}
    </ul>
</div>
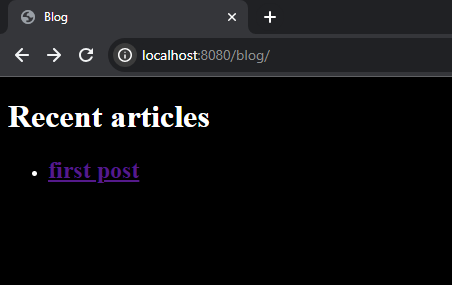
Once saved, the blog page in your browser should update and show the title of your newly created post. Clicking the title brings you to a new page displaying the content of your post.
Publishing the blog
Now that we have a basic blog site, let's publish it using GitHub and Netlify. go into your terminal in VS Code and stop the running task by pressing CTRL + C and accept it with "y". First, we need a " .gitignore " file, which tells git which files should not be uploaded. Simply copy this standard ".gitignore" for 11ty.
.gitignore
# dependencies installed by npm
node_modules

# build artefacts
public
css

# secrets and errors
.env
.log

# macOS related files
.DS_Store
then initialize the git repository by typing the following in the terminal.
git init -b main
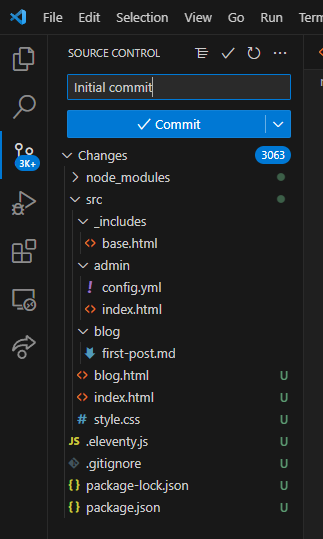
in the sidebar VS Code a modification will appear, click on in. in the new window type Initial commit in the text box and hit the Commit button. next up, the button says Publish Branch, hit the button again.
Select a name for the repository and select to set the repository public .
Adding the Blog to Netlify
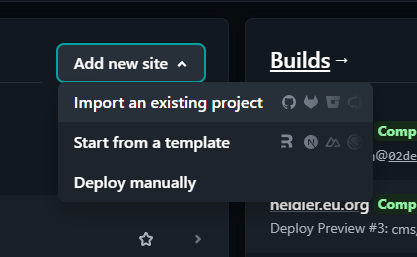
Next up Netlify! head over to app.netlify.com and press the button: "Add new site" and select "Import existing project".
On the next page, select GitHub.
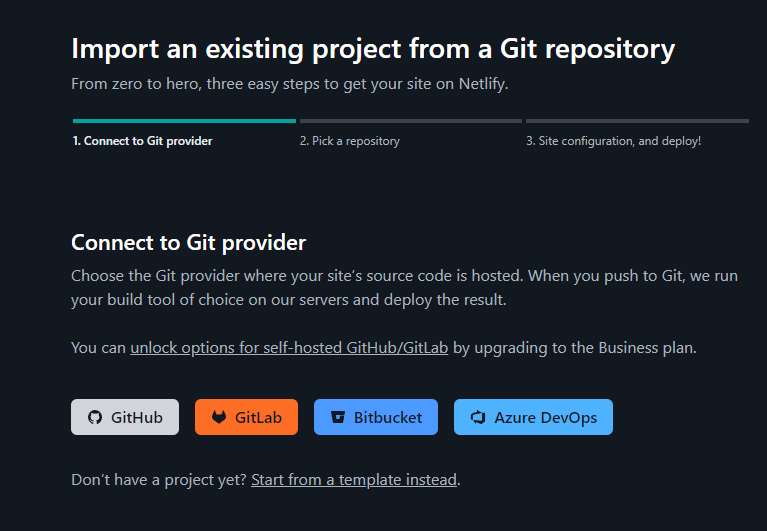
Login with the same GitHub account, on which you published the repository earlier, and select the repository in the following window. Next up are the build settings. On this window, it is important to input the exact values under basic build settings. For build command input the command we created earlier " npm run build " and for the publishing directory select " public ". The Base directory should be left empty. Then hit "Deploy site". Once the site has been deployed a link will be shown, click on that link and your simple blog should be visible. This link is the link you can share with the world.
Adding DecapCMS
Now that our basic blog site is online. Let's add a content management system (short CMS). To do so, create a new folder in the src directory called " admin ". For DecapCMS to work, we need two files in this directory: an index.html and a config.yml . Let's start with the index.html by copying the following code found on the DecapCMS site.
src/admin/index.html
<!doctype html>
<html>
    <head>
        <meta charset="utf-8" />
        <meta name="viewport" content="width=device-width, initial-scale=1.0" />
        <meta name="robots" content="noindex" />
        <title>Content Manager</title>
    </head>
    <body>
        <!-- Include the script that builds the page and powers Decap CMS -->
        <script src="https://unpkg.com/netlify-cms@^2.0.0/dist/netlify-cms.js"></script>
    </body>
</html>
Next up, we need to configure DecapCMS in your config.yml.
src/admin/config.yml
backend:
    name: git-gateway
    branch: main
    media_folder: "public/assets/blog"
    public_folder: "/assets/blog"
    collections:
        - name: "blog"
    label: "Blog"
    folder: "src/blog"
    create: true
    slug: "{{year}}-{{month}}-{{day}}-{{slug}}"
    fields:
        - {label: "Title", name: "title", widget: "string"}
        - {label: "Description", name: "description", widget: "string"}
        - {label: "Tags", name: "tags", widget: "list", default: ["post"] }
        - {label: "Body", name: "body", widget: "markdown"}
At the start of the file we are telling DecapCMS which backend we are going to use for us, it's going to be Netlify with GitHub. the next two lines declare the folder where our images for the articles are going to be. then we add a collection with the name of " blog " and a label of Blog . your blog articles are in the folder src/blog . we allow the CMS to create articles and say how to name the article files. The fields declare the data we want in the post.
In the ".eleventy.js" file, we then have to allow the config.yml file. Simply add this line below the line for the style.css
.eleventy.js
eleventyConfig.addPassthroughCopy("./src/admin/");
Authentication with Netlify
Now head back over to the Netlify dashboard of your blog and click on " site configuration ". In the sidebar, select " Identity " and " Enable Identity ". under Registration, change the Registration preferences to invite only . Scroll down and enable Git Gateway.
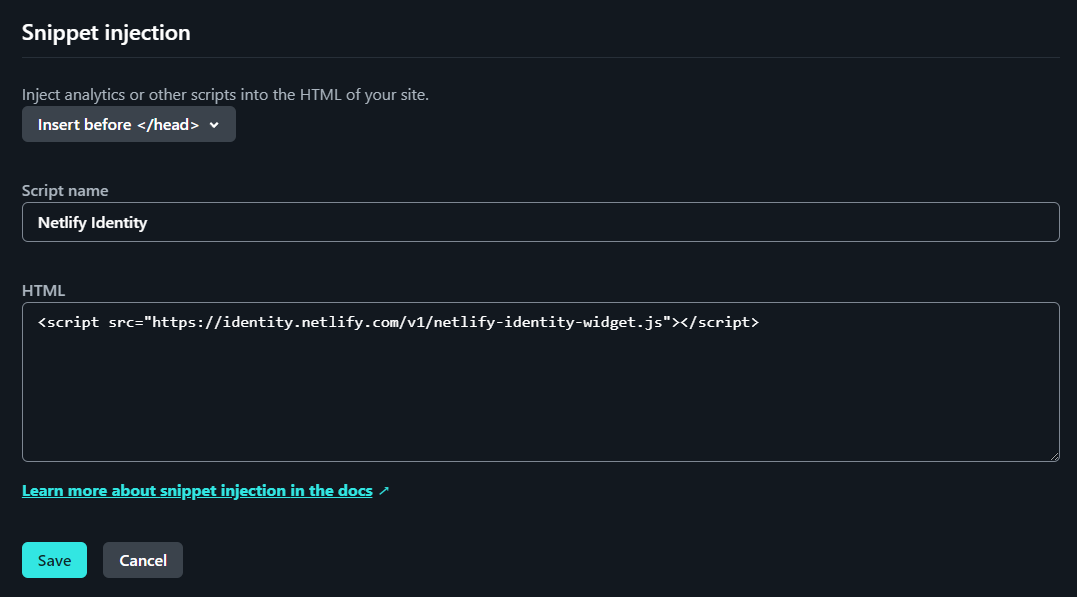
Head over to Build & deploy > Post processing and add the following code as a code injection before the closing head tag.
<script src="https://identity.netlify.com/v1/netlify-identity-widget.js"></script>
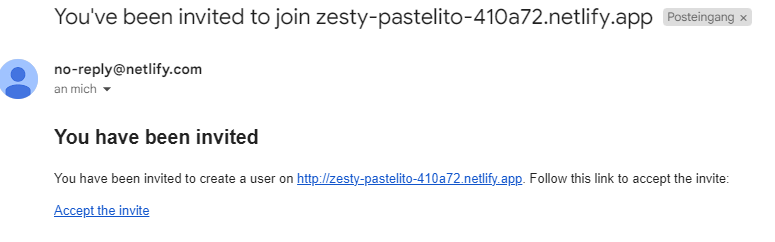
Next, head to the sidebar on the far left and Select Integrations > Identity and click on view in the Netlify Identity box. In the right top, you can invite users to enter your own e-mail address. In your mail, click on Accept the invite .
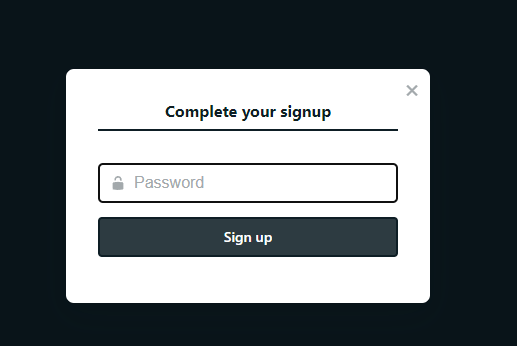
In the new window, set a password for your account.
Next up, go to the root of your blog site and add /admin to the end of the domain. The Content Manager from DecapCMS shroud appear, and you can start editing/creating new blog entries.

Thanks for reading!
The finished project can be seen on my GitHub at https://github.com/timplay33/Tutorials/tree/main/simple-static-blog
more of my stuff at https://theidler.de